Cement Power Trowel Mastery: 15+ Pro Tips to Boost Efficiency
Home » Cement Power Trowel Mastery: 15+ Pro Tips to Boost Efficiency
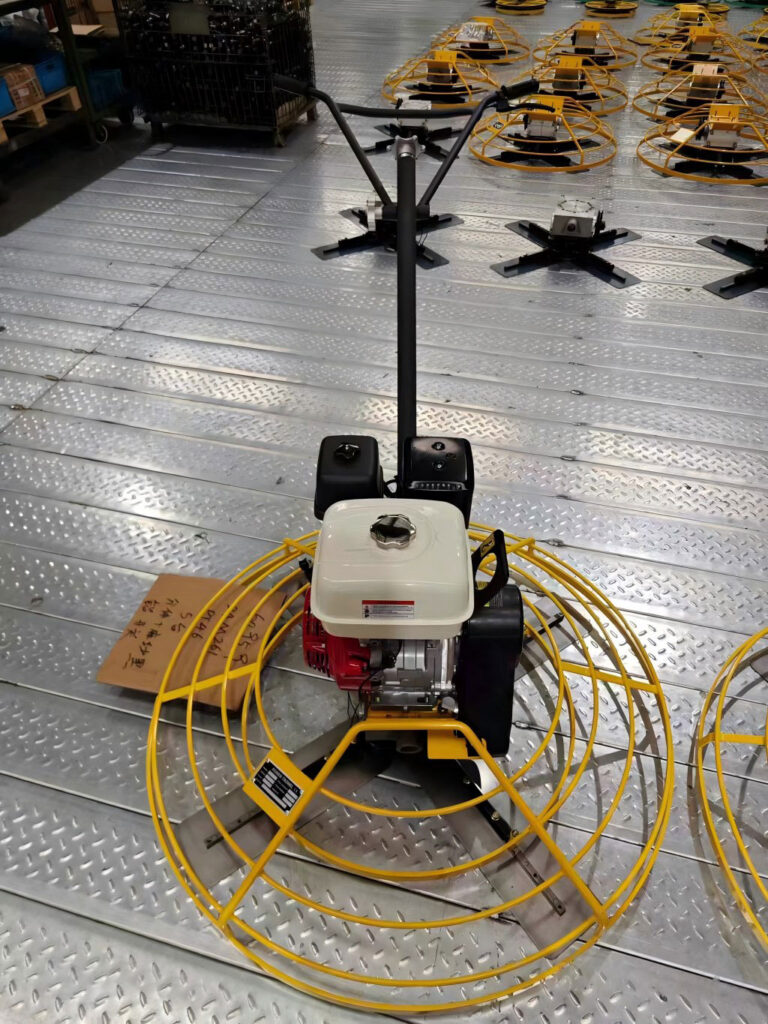
Table of Contents
Introduction to Cement Power Trowels
Concrete finishing is a delicate dance between timing, pressure, and tools. And among the tools, cement power trowels are absolute game-changers. Whether you’re laying a residential driveway or managing a commercial floor pour, a power trowel can drastically improve the quality, speed, and smoothness of your finish.
In this article, we’ll cover every aspect of using a cement power trowel efficiently—from basic types and components to 15+ expert tips that will elevate your concrete finishing results.
What Is a Cement Power Trowel?
A cement power trowel, also known as a power float or helicopter, is a mechanical device used to smooth and finish concrete slabs. It replaces hand troweling, offering more uniformity and speed—especially important for large-scale jobs.
Power trowels use rotating blades or pans to press and polish the concrete, helping to consolidate the surface and increase durability.
Types of Cement Power Trowels
There are primarily two types of cement power trowels:
Walk-Behind Power Trowels
These are manually operated machines ideal for smaller or confined spaces. They’re lightweight, portable, and more cost-effective.
Ideal for:
Residential floors
Driveways
Sidewalks
Ride-On Power Trowels
These larger machines are designed for bigger surfaces. Operators sit on them and use controls to maneuver the trowel.
Ideal for:
Warehouses
Airport hangars
Shopping malls
Key Components of a Cement Power Trowel
Understanding your machine helps in better operation and maintenance. Here are the core components:
Blades: Float or finish blades that contact the concrete.
Spider Assembly: Holds the blades and allows pitch adjustment.
Gearbox: Transfers engine power to blades.
Engine: Powers the trowel (gasoline or diesel).
Handle (or Controls): For movement and pitch control.
Why Use a Cement Power Trowel?
Here’s why professionals swear by power trowels:
Speed: Finishes large slabs quickly.
Consistency: Uniform finish every time.
Strength: Helps densify the surface.
Smoothness: Achieves polished concrete look.
Cost-Efficiency: Reduces labor and long-term maintenance costs.
Safety Guidelines Before Operation
Safety should never be an afterthought. Before starting:
Wear PPE: gloves, eye protection, boots.
Check fuel and oil levels.
Ensure blade condition is optimal.
Clear the area of debris.
Test controls and engine before contact with concrete.
Step-by-Step Guide to Operating a Power Trowel
Operating a cement power trowel effectively requires good timing and proper technique. Whether you’re using a walk-behind or ride-on trowel, the following guide can help ensure optimal results:
Preparing the Concrete Surface
Before troweling, check the moisture and firmness of the concrete.
Timing is everything: Begin troweling when the concrete is firm enough to support your weight without leaving a deep imprint—usually 90 to 120 minutes after the pour, depending on temperature and mix.
Initial check: Step onto the slab. If you sink more than 1/4 inch, wait longer.
Surface prep: Clear any debris, high spots, or excess water before starting.
Adjusting Blades for Finish Type
You can switch between floating and finishing by changing the blade pitch and type:
Floating (Early stage): Use float pans or flat blades. Keep the pitch near 0°.
Finishing (Later stage): Use finish blades. Increase the pitch gradually (5°–15°) for a harder, polished surface.
15+ Pro Tips to Maximize Efficiency
Here’s where we dive deep into real-world strategies to optimize your cement power trowel results. These tips are curated from industry professionals and concrete finishing veterans.
Tip 1: Start Troweling at the Right Time
Starting too early causes tearing. Starting too late limits finishing quality. Monitor concrete bleed water closely. Once it disappears and the surface can bear foot pressure without sinking, you’re good to go.
Tip 2: Use Float Pans First
Float pans (large, disc-shaped attachments) are ideal for the first pass. They level the slab and close surface voids. Always float before you finish.
🔧 Pro tip: Pans reduce the risk of digging into the slab—ideal for green concrete.
Tip 3: Gradually Increase Blade Pitch
Don’t jump straight to steep angles. Gradually increase blade pitch with each pass. This helps consolidate the surface and polish without damaging it.
Tip 4: Maintain Consistent Overlap
Overlap each pass by 1/3 to 1/2 the trowel’s width. This ensures a seamless finish and prevents streaks or skipped areas.
Tip 5: Clean Your Trowel After Every Use
Caked-on concrete reduces blade efficiency and can leave drag marks. Use a wire brush or scraper and rinse with water immediately after use.
Tip 6: Use Correct Speed Settings
Start slow during the floating phase. Increase speed gradually as the surface hardens. Most machines have variable-speed throttles—use them wisely.
Tip 7: Don’t Rush the Drying Process
Applying pressure on overly dry or overly wet concrete can lead to imperfections like blistering or surface scaling. Respect the concrete’s natural curing time.
Tip 8: Use the Right Blade for the Job
Float blades for early stages
Finish blades for hard troweling
Combination blades for small jobs
Choose based on your slab size, mix design, and surface requirements.
Tip 9: Inspect Blades for Wear
Worn or bent blades result in uneven finishes and increased fuel use. Replace or rotate blades as needed. Check before every job.
Tip 10: Alternate Your Pass Direction
Change direction with each pass—first north-south, then east-west. This creates a crosshatch pattern that results in a flatter and more polished finish.
Tip 11: Consider Edge Troweling Tools
Use smaller hand tools or edging trowels around corners and edges where power trowels can’t reach. This prevents overlap marks and inconsistent textures.
Tip 12: Watch for Surface Defects
Keep an eye out for:
Surface cracks
Blistering
Air pockets
Address defects quickly to avoid long-term damage or aesthetic issues.
Tip 13: Combine with Laser Screeds for Flatness
In large-scale projects, using a laser screed before troweling ensures precise flatness, making the troweling process smoother and more efficient.
Tip 14: Balance Speed and Pressure
Applying too much downward force too early can gouge the surface. Let the trowel do the work. Use minimal downward pressure, especially on early passes.
Tip 15: Stay Trained and Informed
New blade designs, fuel-efficient engines, and ergonomic controls are constantly evolving. Stay updated with trade shows, manufacturer guides, and training videos.
Bonus Tips
Keep spare blades and belts on-site.
Use anti-vibration gloves to reduce fatigue.
Follow a clean-start checklist before every job.
Document best practices and settings for repeat jobs.
Maintenance Best Practices
Regular maintenance extends the life of your trowel and ensures consistent performance. Here are key routines:
Daily: Clean blades, inspect bolts, check fuel and oil.
Weekly: Lubricate moving parts, inspect belts, test clutch.
Monthly: Change engine oil, clean air filter, inspect gearbox.
Annually: Full inspection of frame, engine, and spider assembly.
Common Mistakes to Avoid
Avoid these common pitfalls:
Starting too early or too late
Ignoring blade wear
Overlapping too little
Using wrong blade type
Failing to inspect machine before use
Neglecting edge finishing
Skipping float phase
Top Brands and Models to Consider
Here are industry-recommended trowels for various needs:
| Brand | Model | Type | Notable Feature |
|---|---|---|---|
| DIMEC | PME-S120 | Walk-Behind | Lightweight, gas-powered |
| Multiquip | B46H90 | Walk-Behind | High-speed blade rotation |
| Allen Eng. | HDX780 | Ride-On | Ergonomic joystick controls |
| Wacker Neuson | CRT60-74L | Ride-On | Twin engine power, hydrostatic |
👉 How to Choose the Right Size of a Concrete Power Trowel Machine regularly updates reviews on top models.
FAQs
Q1: When should I start using a power trowel on fresh concrete?
Start when the surface supports your weight with minimal indentation—usually 1.5 to 2 hours after pouring.
Q2: Can I use a power trowel indoors?
Yes, but ensure proper ventilation for gas-powered models or use electric models to avoid fume buildup.
Q3: What’s the difference between float and finish blades?
Float blades are flat and used early to level; finish blades are pitched to polish and densify the surface.
Q4: How do I choose between walk-behind and ride-on trowels?
Use walk-behinds for areas <5,000 sq. ft., ride-ons for larger commercial slabs.
Q5: Can I use a power trowel on decorative or stamped concrete?
Generally, no. Power trowels can damage decorative textures—hand tools are preferred.
Q6: How often should I replace the blades?
Blades typically last 60–100 hours but check regularly for signs of wear, bending, or dullness.
Conclusion
Cement power trowels are indispensable tools for achieving smooth, dense, and professional concrete finishes. By understanding their operation and applying the 15+ pro tips shared in this guide, you can increase both the quality and efficiency of your concrete work.
From choosing the right blade to maintaining your machine and avoiding rookie mistakes, this guide serves as your complete roadmap to troweling mastery.
Small Construction Equipment Specialist
About the author

Amber Lu
General Manager | Wuxi Pinnacle Mechanical Equipment Co., Ltd. (PME)
Specialist in Compact Construction Machinery & International Trade
As General Manager of PME, I bring over 15 years of expertise in compact construction machinery and global trade. I have worked extensively with medium to large companies worldwide, providing professional support and customized solutions across diverse markets.
With in-depth product knowledge of plate compactors, tamping rammers, floor saws, concrete vibrators, engines, and power equipment, I lead PME’s international expansion and customer service strategy. My experience covers the full trade process—from pre-sales consultation and order coordination to after-sales service—ensuring efficiency and customer satisfaction.
Backed by a skilled technical team and complete in-house production capabilities, I am committed to driving product quality, innovation, and long-term partnerships across more than 68 countries.

You May Also Like